My DIY Pineapple vase for a magical Tiki Backyard party

My DIY Pineapple vase for a magical Tiki Backyard party Home Decor  tiki fans tiki bar DIY tiki bar DIY pineapple vase artist photo blog   My DIY Pineapple vase for a magical Tiki Backyard party Home Decor  tiki fans tiki bar DIY tiki bar DIY pineapple vase artist photo blog   My DIY Pineapple vase for a magical Tiki Backyard party Home Decor  tiki fans tiki bar DIY tiki bar DIY pineapple vase artist photo blog

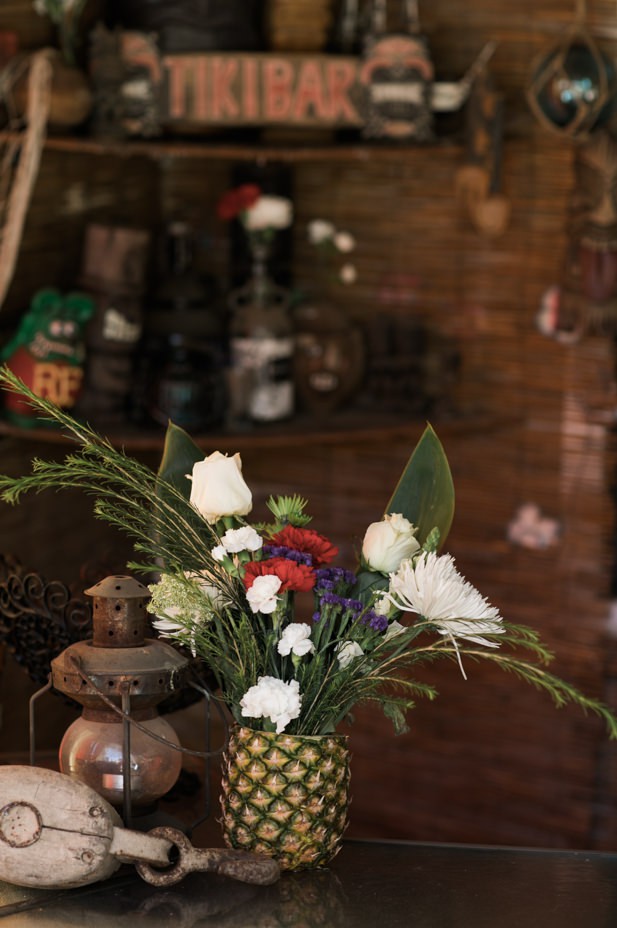
During the last minute 4th of July party, I had this odd panic to really dress the backyard up with some fresh flowers.  I don’t ever really have tons of friends over, so if I was going to spend the money for a party than it was damn well going to look cute!  I didn’t have any vases so I went to the next best thing which was… one of my 4 pineapples that I had purchased.

Farewell, little pineapple friend. 

I used my Adorox Stainless Steel Pineapple Fruit Core Slicer Cutter Kitchen Tool (Stainless Steel (1 Slicer))My DIY Pineapple vase for a magical Tiki Backyard party Home Decor  tiki fans tiki bar DIY tiki bar DIY pineapple vase artist photo blog   which is God’s gift to pineapple addicts like myself. SO MANY PINEAPPLES I CAN EAT NOW! That and it empties the core out of the pineapple. I hollowed it out a bit more after using the core slicer. I then shoved a plastic red solo cup in that little pineapple.

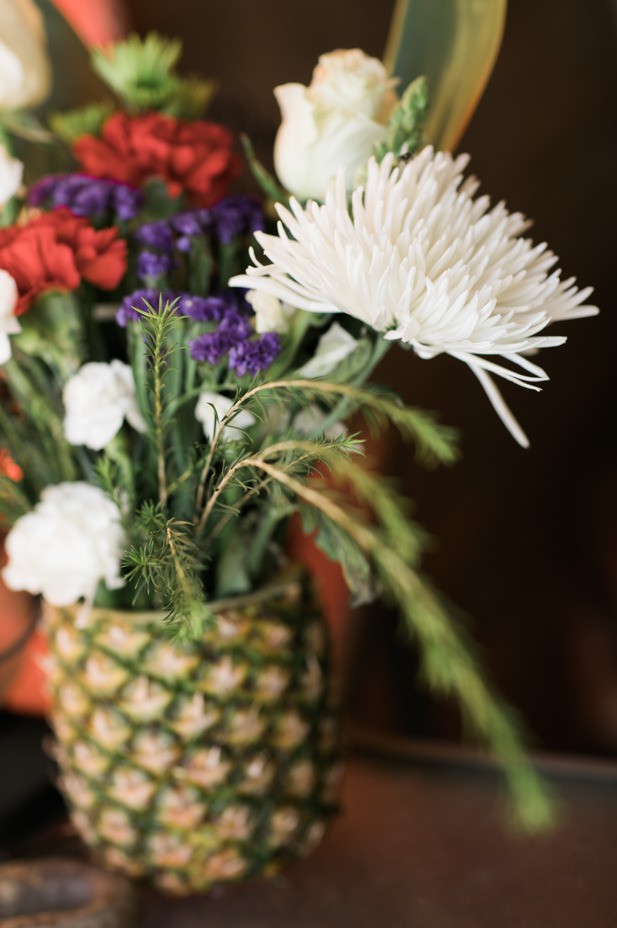
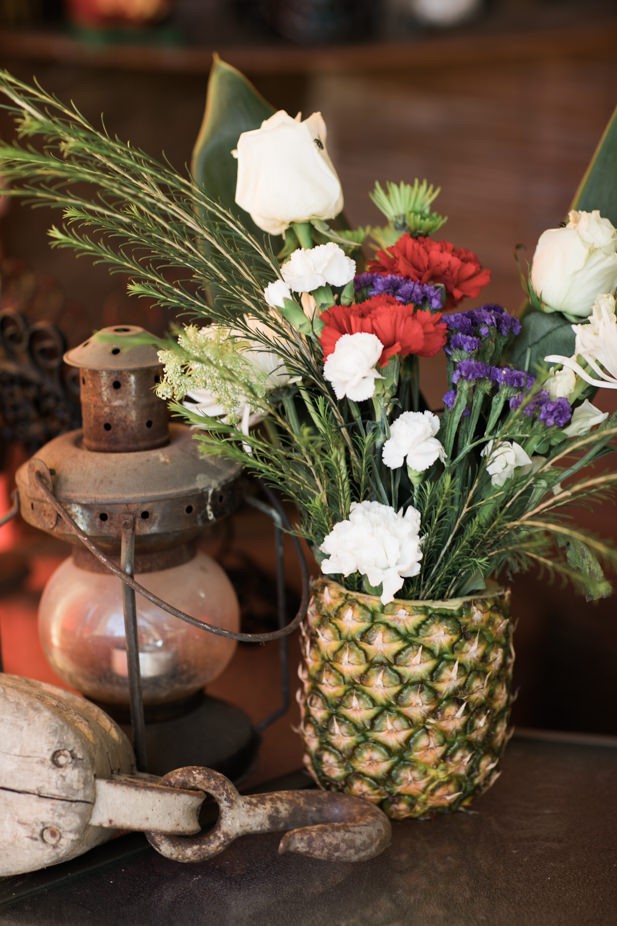
And WAHLAH. I have a tiny pineapple vase. I trimmed all the flowers to fit the length, played with the arrangement and was so happy with the final result.

My DIY Pineapple vase for a magical Tiki Backyard party Home Decor  tiki fans tiki bar DIY tiki bar DIY pineapple vase artist photo blog   My DIY Pineapple vase for a magical Tiki Backyard party Home Decor  tiki fans tiki bar DIY tiki bar DIY pineapple vase artist photo blog

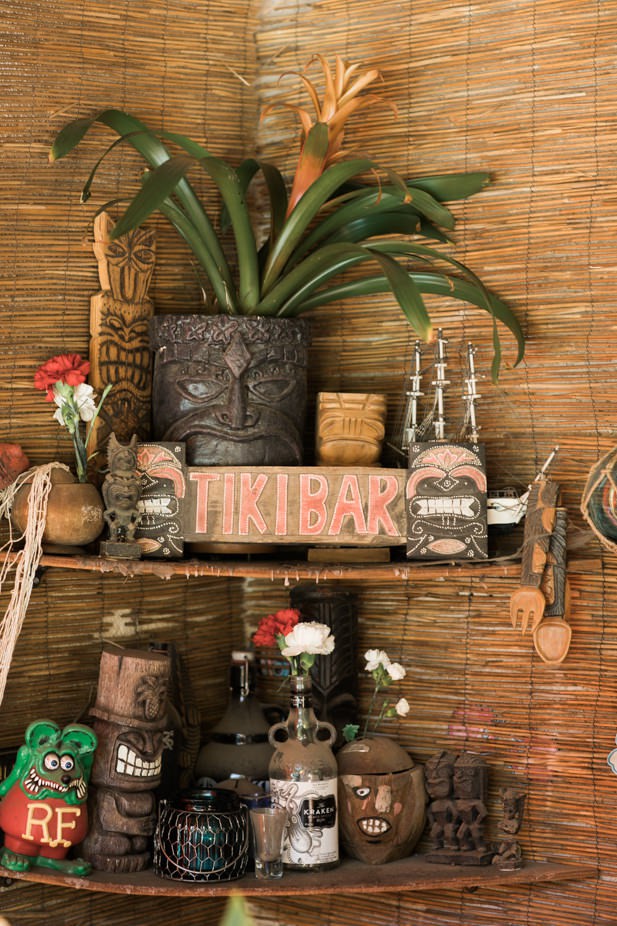
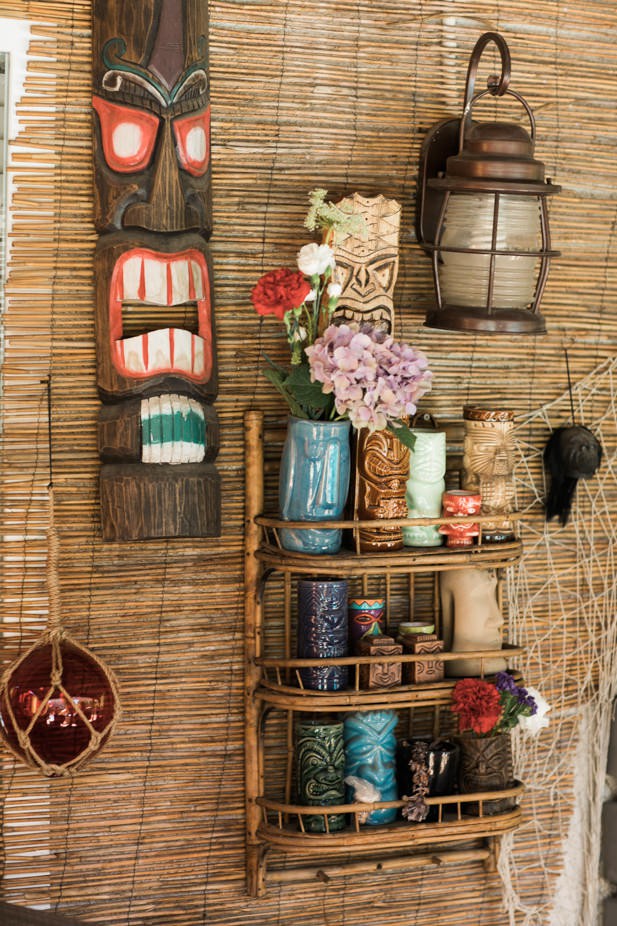
I then took the rest of the leftover flowers and spread them over the tiki bar. Pop one in a tiki mug here, here… and here! As you can see, my little bar is a work in progress. It’s a nice collection of tiki mugs from all over the country, random thrift store finds, and crafts made by my brother.

Hope you enjoyed! Happy Monday xo

Continue Reading

Be here. Be Present. Wherever you are, be there | How I started to have happier days

Be here. Be Present. Wherever you are, be there | How I started to have happier days Home Decor Journal  willie nelson fan art Willie Nelson DIY wood artwork DIY willie nelson wall art

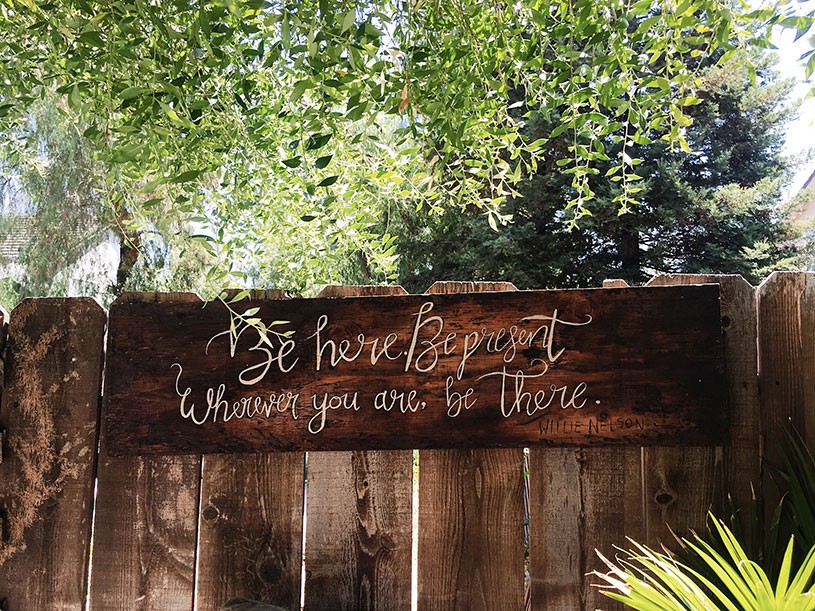
Yes, I made a Willie Nelson DIY wall art piece for my backyard.  After hours of mixing water, non-toxic stain, and coffee created the prettiest little piece of wood in the west.  Then to top it off with ink, acrylic paint, and wood burning, I made that piece of wood into my little piece of art.

But it wasn’t just a cool quote, it was a little reminder of some advice that I need to follow.

“Be here. Be present. Wherever you are, be there.” ~ Willie Nelson

To me, this applies to when you are focusing on crap in the back of your mind when you should be enjoying your present moment. Or when you are living your life based on past experiences, or out of fear for the future.


Unfortunately, I was blessed with a multitasking brain. I can answer e-mails, edit images, and have a conversation with my dog all at the same time. While at the same time water coloring while images process. I can text a full conversation while having a full conversation with another person (I don’t recommend it, it’s still rude). Wow! What a blessing one might say.

How about no. A multitasking brain is a brain that can’t let shit go. 

Add in some depression and anxiety issues I’ve had to fight over the years, and we have a real mess.

How I changed my way of experiencing life

It took me until I read Willie Nelson’s book “The Tao of Willie: A Guide to the Happiness in Your HeartBe here. Be Present. Wherever you are, be there | How I started to have happier days Home Decor Journal  willie nelson fan art Willie Nelson DIY wood artwork DIY willie nelson wall art   ” to really understand the concept of being present. 30 years and I figured it was just showing up and paying attention. I am present, I figured. Yes, I was present while I was living my day-to-day life, but I was also using that multitasking brain of mine to think of every God damn rotten thing that had gone on in my life. I would fixate on it. My day would be subconsciously ruined daily but things that had happened, or things that I was scared of happening.

Yes, that’s right, I was ruining my days with this backpack of worry hanging off my back. It made my shoulders ache. It made me tired. And it was a backpack filled with shit that I couldn’t change or do a damn thing about. I would be at Disneyland and instead of focusing on the fact I was with amazing people seeing amazing things… my head is stuck on what happened last month that hurt my feelings and asking myself why it happened.

Think about it. How dumb is that shit? 

Upon reading the “The Tao of Willie”, I learned something very valuable. To let go. To just drop the damn backpack of bullshit (B.o.B) off and enjoy the adventure I was on.

“Let go, and you’ll be free to find happiness now.” ~ Willie Nelson

To let go was to focus on my task at hand more deeply. To let go was to really enjoy the performance of a song rather than focusing on a memory that was pulling at my heartstrings subconsciously. Once I told myself I was going to really focus on the moment that I was experiencing right now, I truly realized how little I do let myself focus on enjoyment.

Instead of kissing a man I really had feelings for and really enjoying that beautiful moment, I spent the whole time worrying when he was just going to screw me over like all of them. 

Instead of enjoying the people that I was photographing and creating powerful art that represented them, I was going in auto pilot while in my mind also trying to figure out why my ex-best friend turned out to be a total asshole.

Instead of being out having drinks and laughs with friends, I was trying to find the quickest way to shut up my annoying multi tasking brain so I could just feel nothing.  

Here I was, an incredibly blessed human being given these amazing experiences and I wasn’t taking them in. I wasn’t cherishing that moment and soaking in each little bit. It was this realization that I knew I needed to really find a way to change this pattern. How do I shut up this damn brain of mine and really focus on the people and things in front of me? 


I pulled away from Social Media

Let’s face it – your brain isn’t really functioning too much when you are mindlessly scrolling and liking for hours.  I deleted the Facebook app off my phone and vowed to only use it for marketing purposes when I was in my office and in work mode. Instagram was only used when in work mode. Every social media app, except Instagram, was deleted. This was really tough for about two days because I felt like I didn’t know what to do with my brain when standing in line, or sitting in the car, or you know…. any of the other million times I would be on that damn thing in a day.

Yes, I was reading while I was using the apps. Sharing, liking, commenting. But it took so little brain power that there I was thinking about the “text message that came in without an emoji from the cute boy at 3 pm and I wonder if he still likes me? Oh, and should I have really eaten that damn English muffin this morning? So many calories….” You get the point. It’s exhausting.

Once I stopped having anything on my phone to mindlessly scroll through, I started standing in the check out lines and actually looking around again. People started to say “hello” more often and I was able to have random networking conversations wherever I went. And because I was so dedicated to playing with this new game of “being present” I was really focusing on what people were saying to me. I wasn’t ready for a response before they finished anymore because for the first time I was finally listening.

Another great thing that came from turning off my social media except for once a day, is that I spent a whole lot less time comparing my life to others. This alone took a weight off my shoulders that I cannot even describe. No more wondering about other people and constantly being jealous of their awesome amazing internet lives! I was free!

The only downside to this step? I spent a lot of times trying to find new things to observe and soak in while sitting at tables with people who weren’t on the path to being present in the moment. 


I started talking about things I really, really am excited about.

Something that I learned the hard way was that the more you talk about something that bothers you, the more your subconscious focuses on it even after the discussion is done. Now you have taken in even more information on this troublesome subject that you have no control over, and you have even more data to fixate on!

Talking about my money stresses. Talking about my broken heart. Talking about my irritation with a girlfriend. Talking about how I am so irritated but this client. Every time I brought it up, the more it would bug me for hours after.  The next day I would wake up and now start analyzing the conversation I just had about the thing that irritated me?  How ridiculous is that? 

So I decided to try something new and crazy in my conversations. Talking about things I love. I started talking about my new art I was working on that I was excited to see it finish. Conversations switched from venting about how annoying my brother was this morning when he left his clothes on the floor AGAIN to how much I was looking forward to the Stagecoach festival I was planning a trip to. Ideas. Goals. Plans. These were the things I talked about with people, rather than my woes. And in turn when my brain was multitasking a bit while bored in line, sure enough, I was focusing on the feelings of excitement and gratitude for my life.

Your words matter. Your thoughts matter.  So choose them wisely. And why wouldn’t you want to think about awesome things instead? Even your lunch you are eating is more worth your thoughts and energy then how irritated you are by your job currently.

Talk of your joys, not your sorrows. 

I took the time to feel the bad feelings.

This may seem counter intuitive, but turns out it was a key in my success. If you don’t get those feelings and get them out, they are going to stay in that fucking B.o.B on your back and weigh you down from that incredible hike we call life.

So I wrote. I listened to music. I played guitar. I gave myself that alone time with no distractions to give 100% of my attention to these feelings. I examined how I felt about it and allowed myself to grieve or feel angry. I then just let it go. I told myself that I had no control of it, and that as long as I wake up still breathing on this beautiful damn planet, that it will be ok. I then just breathed and let it go.  “Breathe from your chest, breathe from your gut, breathe from your heels.” Willie Nelson said in his book. And I did just that while I made the decision to let it go.

Elsa that shit, my friends.
(That was a Frozen reference for those of you who live under a rock).


It’s taken me months to really get this down. This is something I need to keep in check. I still find myself sometimes still going on my phone when at dinner with a loved one, sitting in the car, or just laying in bed at night. I still sometimes will be working out and my brain goes to all of my insecurities rather than pushing myself for the results I know are on the way. But it’s all about catching yourselves in the habits you have that keep self-sabotaging yourself, and slapping yourself on the hand.


Continue Reading

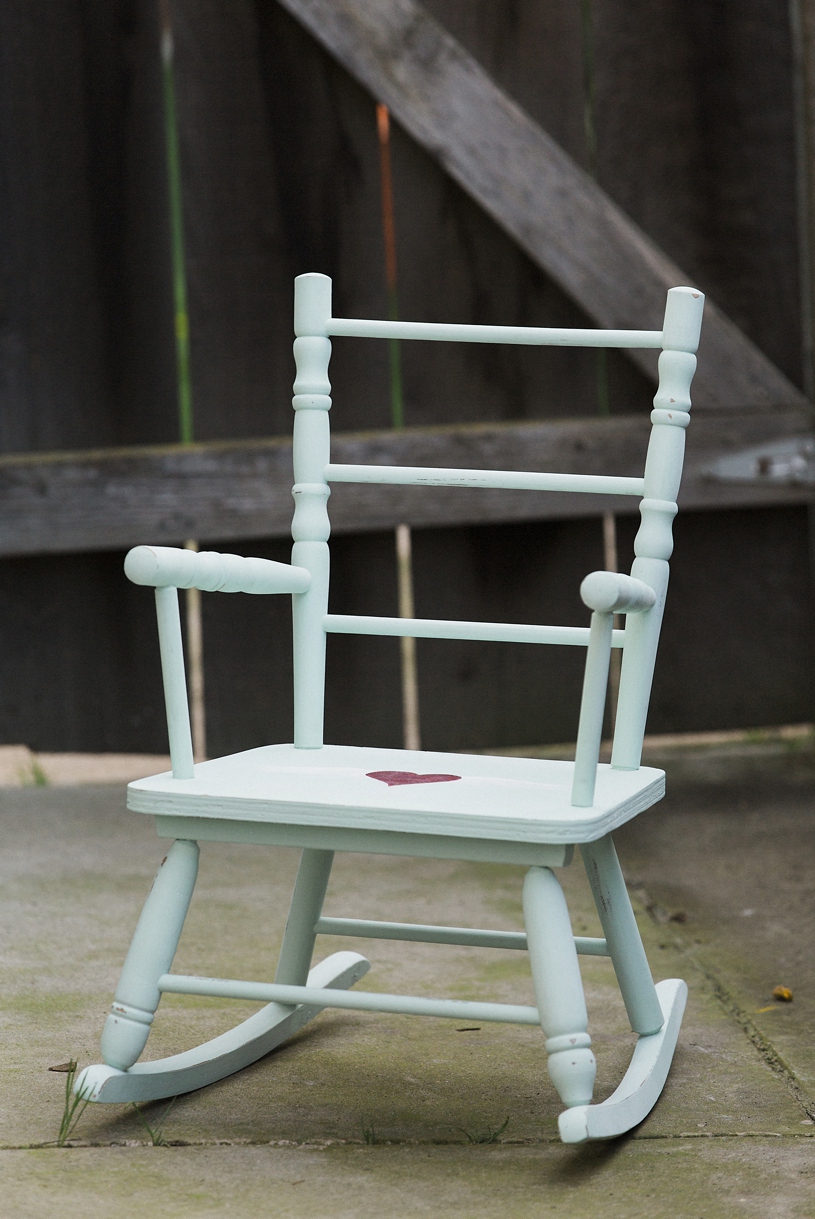
Bohemian Heart Wing kid’s rocking chair DIY project

As I’ve mentioned before in my blog, I have a penchant for old and broken things. So when I find this rickety  $9 chair at a local thrift store in Manteca, I had to pick it up for my niece.

I wasn’t going to leave it as is, of course. It was just a basic solid wood chair. The owner before me seemed to have used a staple gun around the seat to put some sort of cushion and fabric on. After a good hour of prep work that involved a razor blade and pliers, I was able to remove all the jagged little staples that could possibly give my niece a good stab.

Bohemian Heart Wing kid's rocking chair DIY project Home Decor  gypsy kids DIY furniture restoration Bohemian Decor ideas


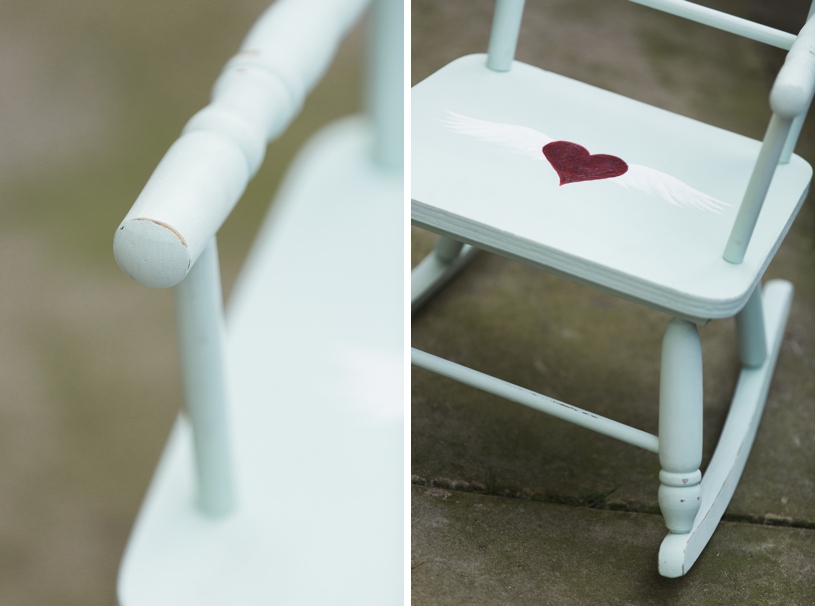
After the sanding and staple removal was complete. In came the paint! I used some FolkArt Chalk paint. Lessons I learned : The roller is a complete waste of time.  I ended up having a far easier time painting this with a regular art acrylic paint brush. And while the paint says that you don’t need a primer – for lighter shades of paint I would really recommend it. Next time! I love the super matte finish. Definitely unlike any other crafting paint that I have ever used. I have to also mention that sanding this down gave it a really great effect. The paint almost falls off like chalk. I guess they named it correctly. 🙂

Bohemian Heart Wing kid's rocking chair DIY project Home Decor  gypsy kids DIY furniture restoration Bohemian Decor ideas   Bohemian Heart Wing kid's rocking chair DIY project Home Decor  gypsy kids DIY furniture restoration Bohemian Decor ideas
Bohemian Heart Wing kid's rocking chair DIY project Home Decor  gypsy kids DIY furniture restoration Bohemian Decor ideas

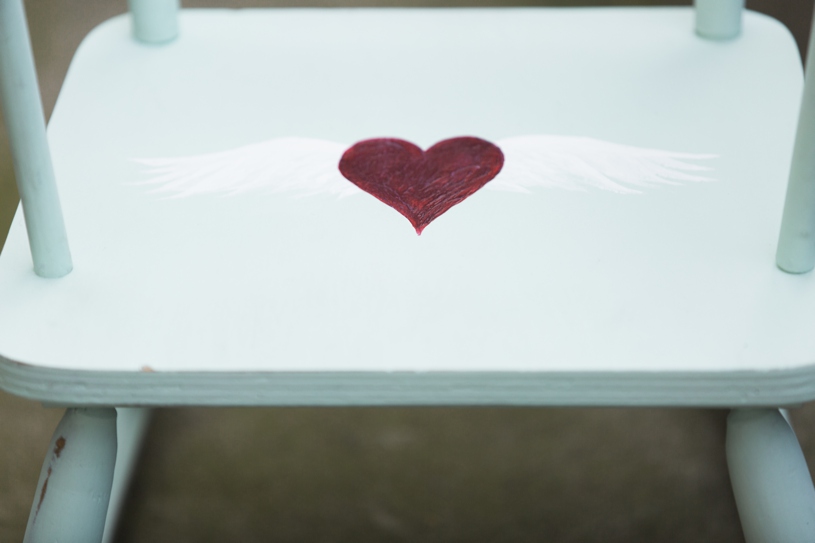
I measured out the seat to make sure I would be painting my design in the middle. Personally, I wanted to hand paint it. However, I am sure if you were making a little rocking chair of your own you could transfer your design on to the wood. I ended up painting this with just two colors, and then sanding it down as well. It added some really cool texture to the red heart!  After it was all sanded to the level of distress that I wanted, I sprayed two coats of acrylic sealing spray.

My niece just loves this rocking chair.  She hasn’t seen this finished version, but she has been rocking back and forth in the original chair for weeks since I first picked this up from the thrift store. What was once junk is now her own one of a kind gypsy, country style rocking chair!

Continue Reading

The Gypsy / Boho Bedroom project – My room!

In my journey for self love and artistic discovery, I found that there is something that really helps the mind calm – a wonderful bedroom.  I have always had a love of old, broken things made beautiful. Bohemian and Gypsy style. Heirlooms mixed with junk. New pieces mixed with old. Gold and rust. Cracks and dust. Modernism and antique.

Turning 30 last year I really decided to put my heart and soul into my art. I’ve been creative since I can remember. So in order to have a nice place to calm myself, meditate, or read I decided my room would be an art project. It is far from done, but I am loving the treasures I have found and created so far.  It brings me calm. The light shines through my windows and dances on the mirrors.

It’s a place that is authentically me. I can paint for hours in this room. I feel relaxed when I lay on my acupuncture mat before bed to get rid of then tension of the day.  It took me 30 years but I am finally living in a little space that I can say is really my space.


The Gypsy / Boho Bedroom project - My room! Home Decor  vintage DIY red wall bedroom Gypsy decor ideas DIY shelves Boho chic Bohemian Decor ideas

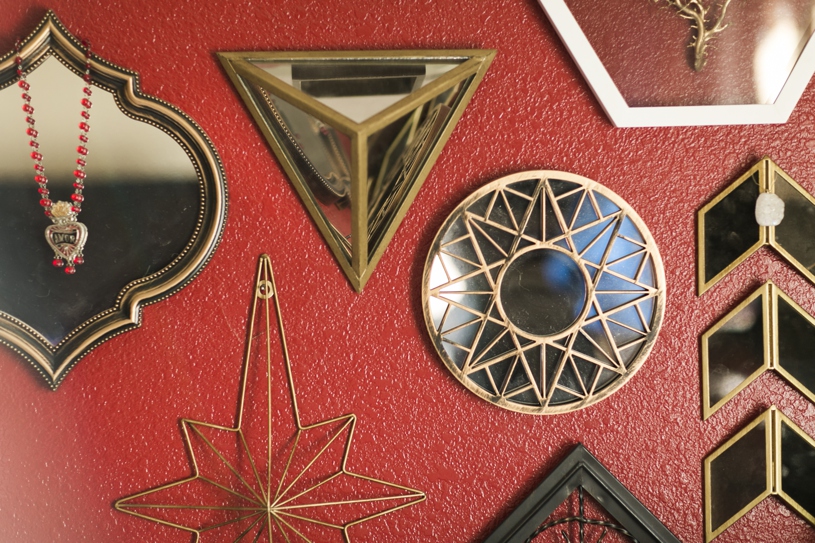
My mirror collage is one of my favorite parts of the room. While I will go a bit more in depth to the pieces once I feel like it is truly finished, I felt compelled to share a bit about it now. I will admit that I have a total passion for vintage pieces. However, I will never count out a beautiful piece that one day will be vintage!  

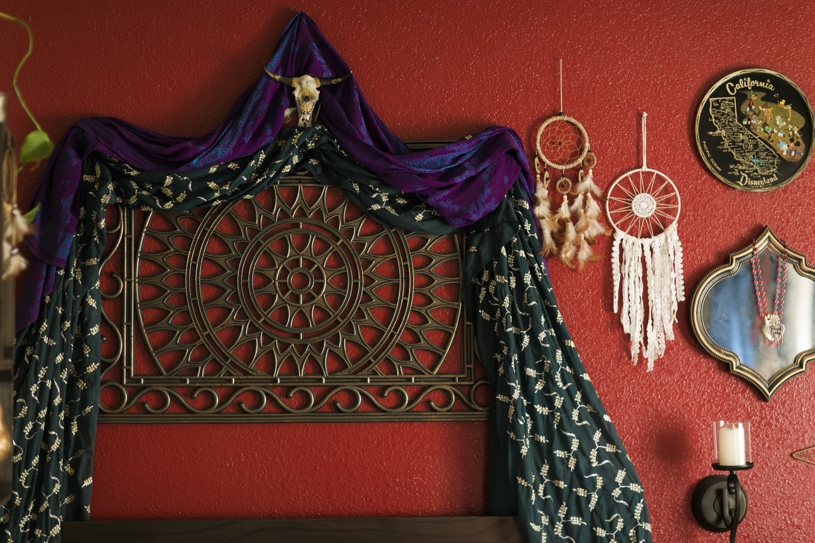
The chevron mirrors are from Target. I originally was going to split them up, but felt like they just looked way too good together. The other mirrors came from thrift stores found locally in the Bay Area. That beautiful, unique starburst piece on the lower left came from Burlington Coat Factory of all places.  I felt like I needed to bring a bit more of the red wall into the pieces, so I chose to hang up a beautiful “Amor” necklace with the sacred heart (purchased at the Betty Page store in San Francisco)that I had in my jewelry box.

The Gypsy / Boho Bedroom project - My room! Home Decor  vintage DIY red wall bedroom Gypsy decor ideas DIY shelves Boho chic Bohemian Decor ideas   The Gypsy / Boho Bedroom project - My room! Home Decor  vintage DIY red wall bedroom Gypsy decor ideas DIY shelves Boho chic Bohemian Decor ideas

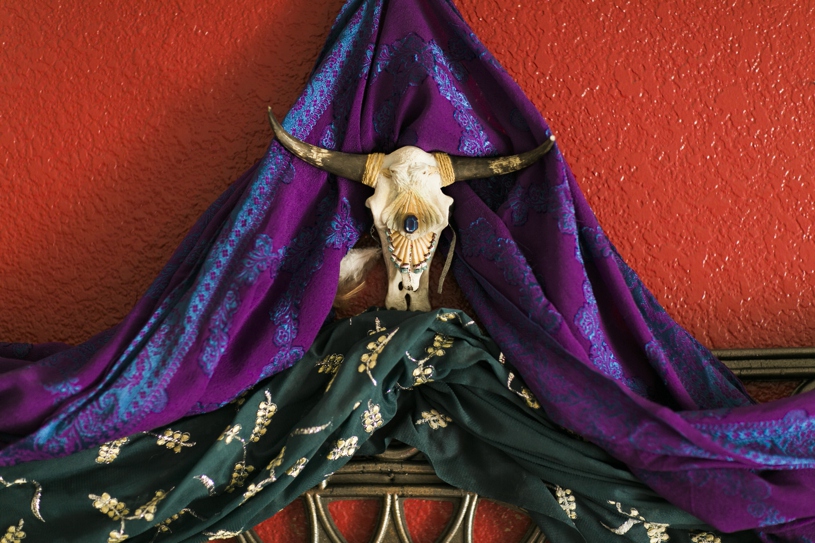
A mix of DIY, random discoveries at second hand stores, and family hand-me-downs. I’ve been holding on to those beautiful textile pieces that I found at yard sales for about ten years that I picked up for photoshoots. Finally they have a use! While they were never featured in any of my photo sessions, they do work well with my colorful bohemian decor.  They frame a beautiful DIY wall piece that I created from a rubber floor mat ($7 thrift store find!), some spray paint, and some bronze acrylic paint to finish it off.  All the beauty of a rustic iron art piece… without having a iron art piece over my head. 

The Gypsy / Boho Bedroom project - My room! Home Decor  vintage DIY red wall bedroom Gypsy decor ideas DIY shelves Boho chic Bohemian Decor ideas

One of my favorite parts of my room is this little piece.  If you know me, you know I am totally a whiskey girl. Give me a juke box and a class of jack at the local dive bar and I will be guaranteed to have a good night. Just don’t give me the whole bottle, then it might be a bad night for everybody 😉 But, I digress…

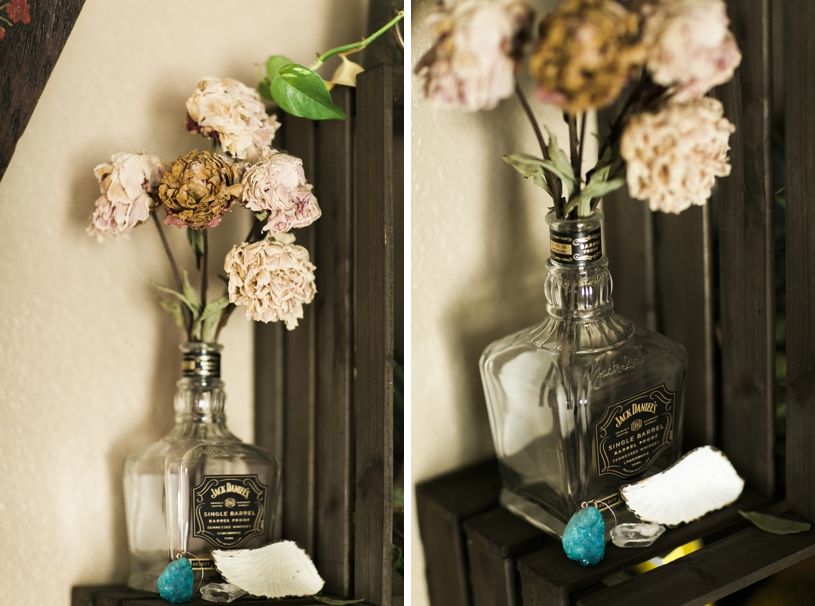
My little brother was given this bottle of Jack Daniel’s Single Barrel in celebration of the birth of his daughter. Rather then tossing it into recycling I just fell in love with the shape and knew I would eventually use it for a project. I’ve been keeping a hold of those beautiful dried flowers for 4 years now that were given to me as a client gift for taking maternity photos. It finally hit me that they would go perfectly into the Jack Daniel’s bottle. The dead flower’s gold hue complimented the gold of the Jack Daniel’s logo. It’s so simple but I am ridiculously obsessed with it!

The teal crystal came from Target. The clear crystal was sent as a gift from a wonderful ebay seller! That beautiful angel wing dish is from one of my favorite online shops, Junk Gypsy.

The Gypsy / Boho Bedroom project - My room! Home Decor  vintage DIY red wall bedroom Gypsy decor ideas DIY shelves Boho chic Bohemian Decor ideas   The Gypsy / Boho Bedroom project - My room! Home Decor  vintage DIY red wall bedroom Gypsy decor ideas DIY shelves Boho chic Bohemian Decor ideas

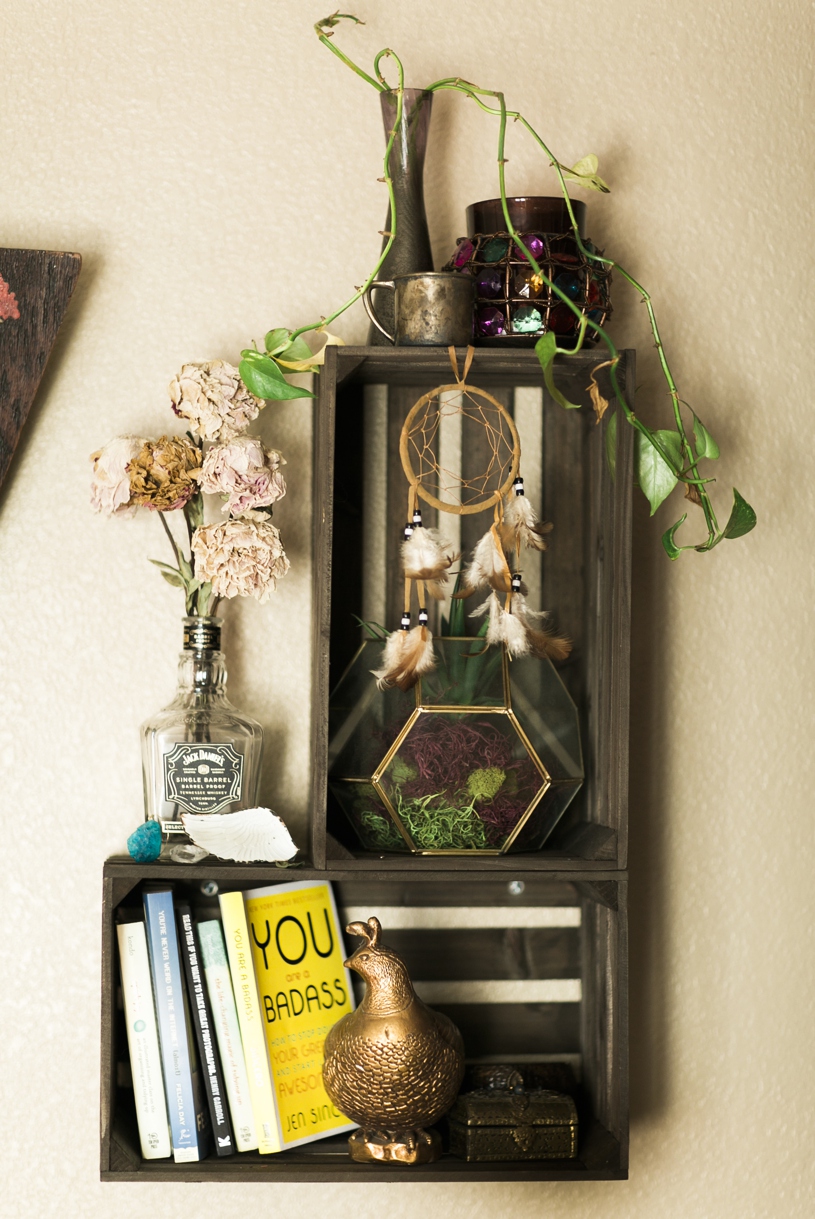
Once again, I put a mixture of the new, old, and special. I live in a rather small space (9×9) so there really isn’t room for bookshelves. I knew I wanted a place to store all of my books and kindle at night that was safe from furry friends knocking it over. So I found these crates at Joanne‘s($7 each). They come in a raw wood, but I HATE the chemical usage of stain you normally can find. I hate the smell! I hate how sticky it all is. So I ordered some PureColor Eco-Friendly Stain in Brunette.  I can’t rave enough about this stain. It was so odor free I could actually stain my crates in the warmth of my home and not in the cold garage! With a sponge it took me just one coat to get the desired finish.

Other thrift store finds? The colorful candle holder on top as well the bronze jewelry box by the quail.

If anyone knows that kind of plant that is, let me know. Hah! No really, it’s a piece of a plant that was pulled off of my Grandfather’s plant that we’ve held on to for 20 years since he passed away. I wanted a piece of it in my room so putting it in water has kept it growing for months. However, I hated the clear purple vase so thanks to some bronze hammered spray paint, I fixed that right away.

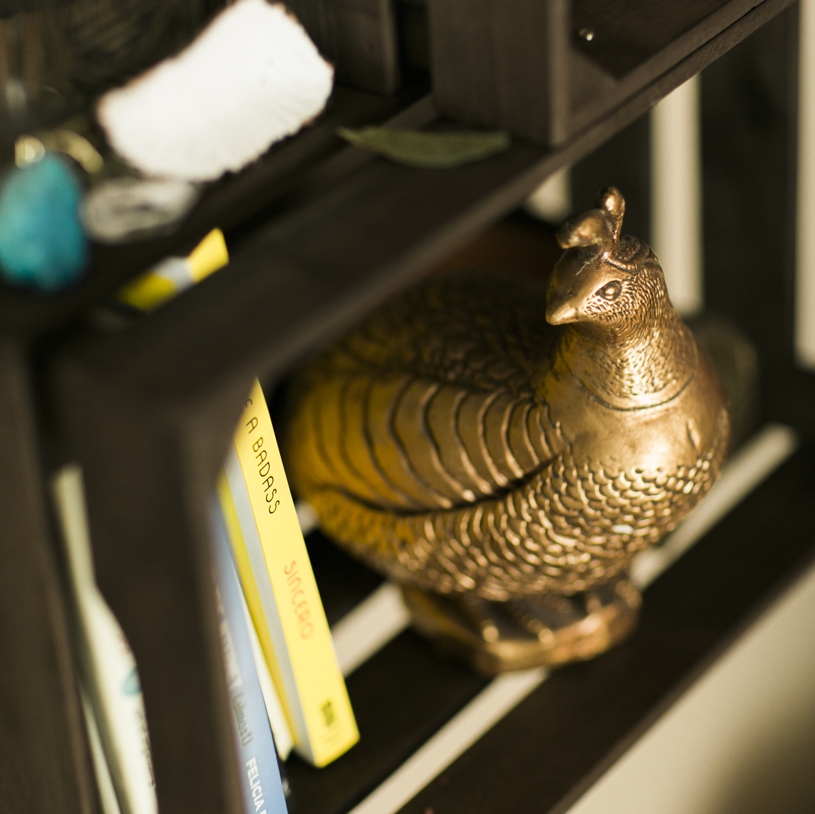
Another sentimental piece you can see if the bronze quail. My last living grandparent recently passed away. When cleaning out my Grandmother’s house I came upon this set of Quails that she had decorating her backyard. I was in need of some nice bookends for my room, and since these were meant for outdoors they were heavy enough to hold books up! So I got a piece of her in my room as well.

The dreamcatchers are gifts from my brother’s girlfriend that she brought back from an Arizona vacation. Once again, more pieces that I have held on to for years knowing that I was eventually going to have a beautiful use for them.  That aged cup on the top was my Great Grandmother’s.  The geometric glass piece and succulent came from Hobby Lobby!


My little space in the world is far from done. But it’s getting there. I’ve found that at this point in my life it’s a really refreshing feeling to come home to a place that really feels like mine.  Admittedly, I am a messy person.  Always have been. Probably always will be. However, to my fellow mess makers – having a space that is truly you maybe not stop you from making a mess, but it sure as hell inspires that clean up day once a week. Not because of the money spent, as most of this was discount, vintage, or family hand-me-downs. But because of how much I truly enjoy my little space.

Continue Reading